In order to meet the objectives I’ve been assigned which are to perform Routine Infrastructure Tasks (i.e. Maintenance work) against ALL servers we manage, I have taken advantage of SCCM (and as well learning from an SCCM expert) to automate these mundane, lame and boring tasks!
The first step with anything is to map out what you want to achieve. Taking the time to plan out your steps from start to finish will allow you to stay focused and keep on track. What you don’t want to do is to lose the momentum you gain when working on a task/project. You also do not want to deviate away from the task at hand as well. Check out Steven Hosking’s blog on Logical Steps to Automate A Task.
What: Clear the Windows Temp directory
When: Once a Week
Why: Stop accumulating unnecessary data on the system drive.
How: SCCM Compliance Settings.
Within SCCM Compliance Settings we will use the ‘detection’ and ‘remediation’ method to achieve our task of cleaning the Windows Temp directory.
Under Assets and Compliance select Configuration Items. When selected right click in the clear space and select Create Configuration Item.

Fill in the below details as you see fit. In the example below, I have named it RITs – Clear Windows Temp Folder. As this task is targeted to the Windows devices, we will leave it as is. Use the Categories too, as you see fit. Select Next once completed.

As we are targeting servers only, we have selected the below. If however you’re managing ALL Windows devices, leave it as default (Select All). Select Next.

Select New…

Enter a Name and Description. From the drop down menus, select Script from the Settings Type and select String from Data Type. Let’s Add Script.. now under Discovery Script.

Now with the Discovery Script I have used the following to identify if there are any data within the Temp directory.

on error resume next
Set FSO = CreateObject(“Scripting.FileSystemObject”)
If fso.folderexists(“C:\Windows\Temp”) Then
If fso.getfolder.Count = 0 And fso.SubFolders.Count = 0 Then
wscript.echo “Compliant”
Else
wscript.echo “Non-Compliant”
End If
Else
wscript.echo “Compliant”
End if
You ask why have I used VBScript to achieve this detection method. Can I use PowerShell instead?
The reason why I have used VBscript over PowerShell in this instance is because of the multitude of servers we manage (also trial and error as I had PowerShell scripts to do ALL my tasks). Because it ranges from Windows Server 2003 to Windows Server 2012 R2, certain PowerShell commandlets may not work with older versions of PowerShell. VB on the other hand is compatible on the majority, if not all Windows servers.
Now with the Remediation Script I have left my PowerShell commands from the start. Reason being is that the Powershell commandlet is compatible across ALL PowerShell versions, therefore there was no reason to change.

Remove-Item C:\Windows\Temp\* -Force -Recurse
$ErrorActionPreference = “SilentlyContinue”
Once completed, you should see the below screenshot match your Settings.

Now Select the Compliance Tab. Once selected, select New…
When prompted with the Create Rule Window, fill in the Name and Description. Leave the Rule Type as default, Value. Set ‘The value returned by the specified script’ as Equal and ‘the following value:’ to Compliant.
Tick ‘Run the specified remediation script when this setting is noncompliant’.
Set ‘Noncompliance severity for reports;’ to Critical.
Once completed, hit OK.

You should now see the newly created Compliance Rule. Hit OK.

You should now see the Detection Method in the Specified settings for the operating system. Select Next >

As we have already created the Compliance Rule we can simply hit Next >

Under the Summary do a quick review before hitting Next > to process and create the Configuration Item.

You have now created the Compliance Item. Time to create the Compliance Baseline and deploy it to a Collection(s).


Now go back to Assets and Compliance and select Configuration Baselines. From here right click in the clear space and select Create Configuration Baseline.

Fill in the Compliance Baseline Name and Description details as you see fit.
In the Configuration Data field, select Add and then Configuration Item.

Search for the the created Compliance Item and select OK.

You should now see the Configuration Item now displaying in the Configuration Baseline data section. With any other tasks specific to clean-up/maintenance, I would include them as well into this Baseline. Once completed, select OK.

You should now see your recently created Compliance Baseline. Now it is time to deploy.

Right click on the Baseline and select Deploy.

By default, the Baseline should already be selected. Tick ‘Remediate noncompliant rules when supported’ and ‘Allow remediation outside the maintenance window’.
If you are taking advantage of SCOM (System Center Operations Manager) you can generate alerts depending on the compliance rate. We will leave this disabled.
In the Collections section, select the Collection you would like to deploy this baseline to. In our case, I will deploying it to our Test Deployment Group.
Now set a schedule as to when you would like this performed and hit OK.

You should now see the baseline marked as deployed.

Now lets browse to a server associated with that Collection and check to see if it has been deployed successfully.
Browse to a server that the Baseline has been deployed to and open the Configuration Manager Properties. Generally it would take several minutes to deploy or pick up (depending on the type of collections available) but you can accelerate the process by going into Actions and selecting Machine Policy & Evaluation Cycle.
Once it has been selected, wait about a minute, close and reopen the Configuration Manager Properties.

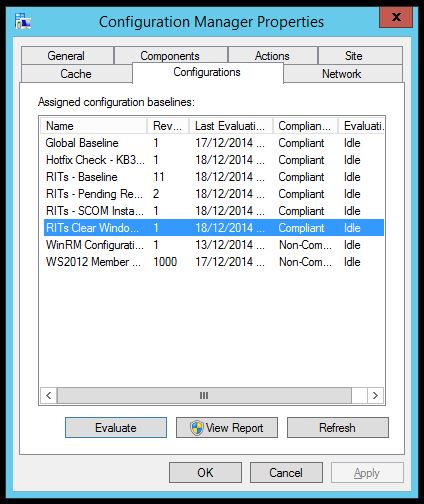
This time in Configuration Manager Properties, select Configurations and in here, you should now see the Baseline we created earlier. You should see the Last Evaluation status as N/A and Compliance State as Unknown…

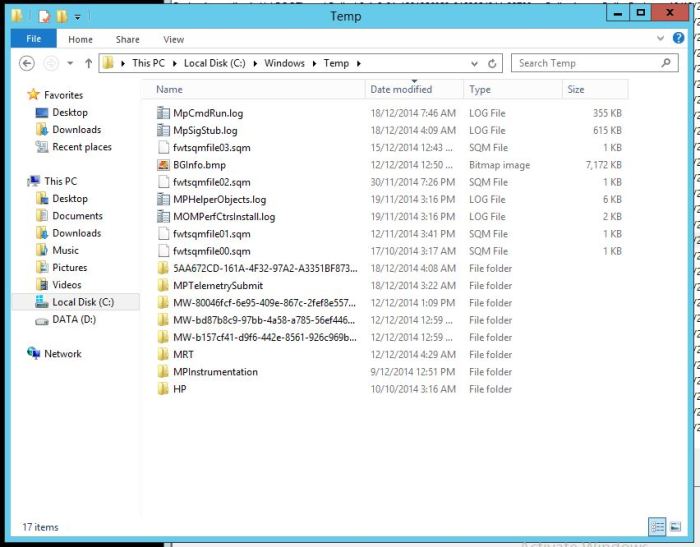
On the server, bring up the Windows Temp directory and lay it side-by-side the Configuration Manager Properties window. Now select Evaluate.
Windows Temp Directory with Data
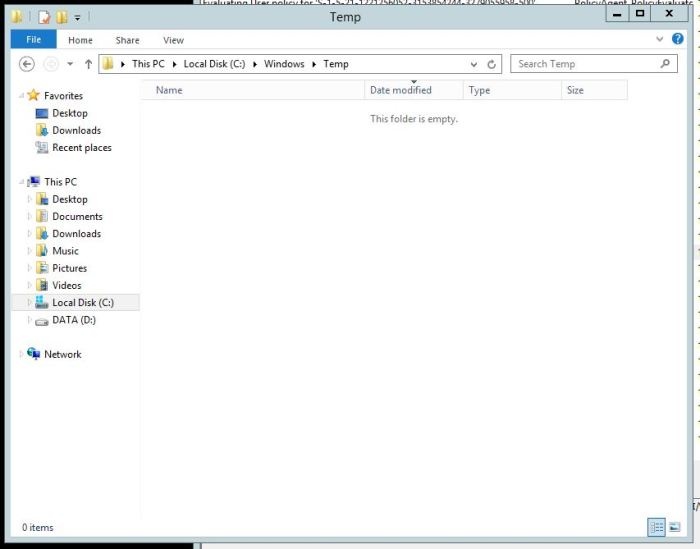
After a few seconds, you should see the data disappear within the Widows Temp directory.
Successful
Back in the Configuration Manager Properties window, you should see the following status.
You have no successfully completed/automate the task of clearing Windows Temp directory!

Great article, thank you for sharing! How can I add a condition to check files older than X days in the discovery script?
LikeLiked by 1 person
Hi,
I’m trying to use this article to empty the C:\Windows\Temp directories on 1.600 Windows 7 computers but the script always returns Compliant even when their are files in the directory.
Could you please help me understanding what’s going on ?
Could you also provide a powershell script that could be tested in place of your vbscript ?
Thanks
LikeLiked by 1 person
Hey Christophe, big apologies for the very delayed response, am wondering if you’re still having issues with the question above? If it’s showing as compliant, we’ll need to slightly tweak it as it maybe picking up something it shouldn’t. If it’s still an issue let me know and I’ll get in touch directly. Thanks again and apologies for the v delayed response!
LikeLiked by 1 person
Thanks for the great idea, however the detection vbscript is not working for me, its giving Line 2, Char 23, Error Invalid character, Code 800A0408
Kindly help.
LikeLiked by 1 person
Hey Arindam, sorry to hear you’re having issues – are you still experiencing issues? If so, high level glance could require a space before the bracket, but I’ll need to refresh and do tests at my end. Let me know where you’re at and if you’re still having issues, I’ll contact you directly to look into it further. Apologies too for the v delayed response. Thanks again mate.
LikeLiked by 1 person
I found the following to works:
Dim objFSO, objFolder
Set objFSO = CreateObject(“Scripting.FileSystemObject”)
If objFSO.FolderExists(“C:\Windows\Temp\”) Then
Set objFolder = objFSO.GetFolder(“C:\Windows\Temp\”)
If objFolder.Files.Count = 0 And objFolder.SubFolders.Count = 0 Then
wscript.echo “Compliant”
Else
wscript.echo “Non-Compliant”
End If
Else
wscript.echo “Compliant”
End If
and the powershell script:
Remove-Item C:\Windows\Temp\* -Force -Recurse
$ErrorActionPreference = “SilentlyContinue”
echo 0
Works perfectly and adding echo 0 at the end of the powershell appears to make it go compliant post run.
LikeLike
Great find and appreciate the share mate! Good little win that!
LikeLike